So I have this idea– get a PowerTap, build a wheel, revise the training routine and schedule, and then enjoy the fruits of my labor. So far so good. In this post I’ll discuss my choice of components, the build process (briefly), and the measured results of the wheel build.
Components
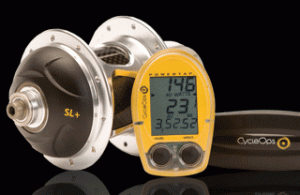
The hub drove the project specifications. In this case, a PowerTap SL+ hub with the accessory electronics pack, and a 24H drilling was my choice. A 32H or 36H would obviously be sturdier but I just didn’t want (or need) that many spokes. PowerTap hubs are also available in 20, 28, and 32 hole drilling. Of course, if I was purchasing a power meter, a wireless system was the way to go…no more wires on my frame. Additionally, should I choose to buy a Garmin 500 head unit in the future the resulting integration would be seamless.
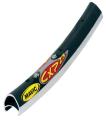
The rim was my next thought. I wanted a rim that was just as light as (or a bit lighter than) my current wheel, a Bontrager RaceLite. Second, the rim couldn’t be a box-section as I wanted comparable aero efficiency too. Third, the braking surface must be CNC machined and the rim joint welded instead of sleeved or pinned. (I’d prefer that the two extruded ends not shift-around under any circumstance.) Last, double-wall construction is preferred. The Bontrager was my baseline rim for the project. It weighed-in at 481g for the 700c size.
I found four candidate rims with the following characteristics:
After wading through the reviews, availability, and costs I decided on the HED Belgium C2. What made this rim stand-out to me was the 23mm rim width. HED engineers designed this rim width coupled with a 23mm-wide tire to produce a rim and tire with straight sidewalls. This CyclingNews.com article spells out the advantages. I also read (somewhere) that HED sent the C2 rim to Continental Tires for testing. Results indicated a 18% to 20% decrease in aerodynamic drag and/or a reduction in rolling resistance. (I’ll ferret-out the source article to this as soon as I find it again.)
Edit 1/2/2010: Here’s the reference concerning the testing at Continental Tires. Note the portion of text that discusses the “C2” advantage.
Spokes connect the hub to the rim. Strength, durability, and a reduced aero signature were characteristics that I wanted. My existing RaceLite wheel has 20 spokes which requires slotted holes in the hub flanges. The new SL+ hub wouldn’t have any slots. The selection of candidate spokes would be limited to a diameter/width less than 2.5mm–the diameter of the flange holes.
I could choose from straight gauge, butted, or bladed designs. I removed straight gauge immediately because of the needless weight. Butted spokes would have a lower cost but would have a higher aero drag coefficient than bladed. For me, it is easier to detect spoke twist on bladed spokes when wheelbuilding. I decided fairly quickly that I would use bladed spokes.
Quick research showed two spokes in contention. DT Swiss’ Aerolite and Sapim’s CX-Ray. Both were reputable companies with their product widely used in the competitive arena. This fact addressed my initial requirements for the spoke choice. Cost would be the next filter. Basically, the Aerolite spoke was $3 and change per spoke with the CX-Ray close behind. Additionally, I found the CX-Ray to have the same finish as my Bontrager wheel, e.g. stainless steel versus the black finish of the Aerolite. I found the SS easier to clean
Sapim’s Polyax spoke nipple design also impressed me. The rounded shoulder design allows additional alignment towards the spoke line between the rim and the hub. Other designs don’t allow this adjustment and so some bending of the spoke shaft can occur. I see this at the bike shop all the time. I figure since I’m building from scratch I might as well avoid this issue.
I believe the CX-Rays to be one of the strongest and most durable spoke in the competition arena today. Sapim’s Belgium cycling background and testing process leads me to think that they’re serious about their product and how it performs in competition. My spoke choice here was easy.
Spoke length was an interesting evolution. You must know the dimensions of your hub before using some of these. I examined the results of three different online length calculators:
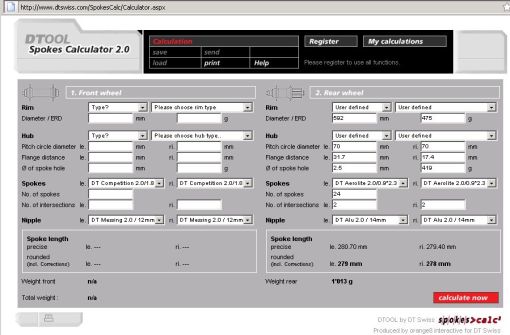
After making the appropriate entries, DT Swiss’ results were a 279mm non-drive side (NDS), and a 278mm drive-side (DS). Additionally, these lengths included a 14mm nipple allowance. Note that I could not choose Sapim spokes but the next closest size. Their interface looks like this:
 Sapim’s calculator is a bit more involved. You must enter certain dimensions such as out-of-hub-nut to center-line of flange for the NDS and DS. Note that there’s no allowance for nipple length. DS was 285mm and NDS was 287mm. (I incorrectly reversed Ka and Kb values upon entry.) Their interface:
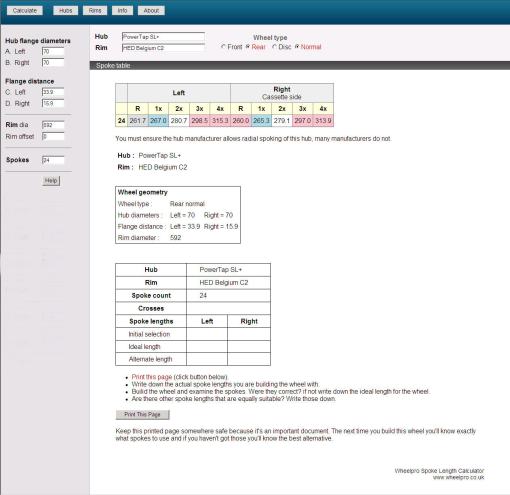
 And last, Roger Musson’s Wheelpro calculations, note also that no nipple allowance is present, but that lengths for different crossing patterns is present. NDS length was 281mm and DS length was 280mm:
I shouldn’t have been surprised that the results were different. But which length to use? I called the experts at Wheelbuilder.com for advice. Vikki said that their technicians use 280mm on the DS and 282 on the NDS. She also recommended that their desired DS tension was 115kg and not to exceed 120kg. I found their customer service to be courteous, surprisingly fast, and refreshingly efficient. I definitely would use their services again and would not hesitate to recommend them to anyone. 24 CX-Ray spokes with Polyax 14mm nipples were soon on their way to my address.
Edit 3/9/2013: after wearing-out the braking surfaces of the C2 rims, I examined the excess spoke thread beyond the nipple head, especially on the DS. In hindsight, I would reduce the length to 277 DS and 280 NDS.
The Build
With all the parts on-board, I was ready to build. Barb and I reached the lake house without incident the following weekend and proceeded to hide-away for our retreat. Only a single jet ski ventured into our cove that weekend. Total quiet, no phone calls, no traffic noise. Oh man, what bliss that was.
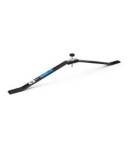
I borrowed the following tools from friends of mine, Tomas and Jayce:
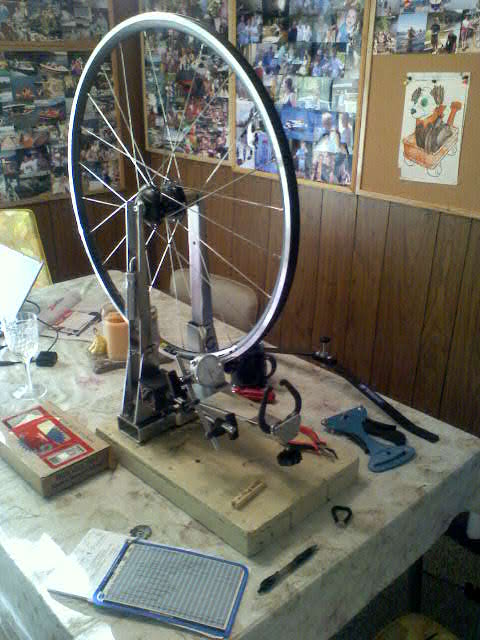
And commenced the rather pleasing process of building my wheel. Tomas has a nice set-up with his truing stand as he has a location-adjustable run-out gauge to assist in measuring what the naked eye cannot discern—a definite plus. I considered the run-out gauge and the tension meter as part of my quality control effort. Ensure that you use good tools because if you don’t the quality of your product may not meet your expectations. This way, you can build the strongest possible wheel with your components.
An excellent and much-read reference to wheel-building was written by Jobst Brandt.Herein you’ll find the same step-by-step assembly instructions that I used. There’s all the information you might want from history to theory. This book is a must-have in my opinion and you might want to check-out Roger Musson’s book (click his calculator link above) for additional knowledge. I laced my spokes in the recommended pattern from the CycleOps PowerTap User’s manual—2x minimum on both sides. My trailing spokes are on the inboard side of the hub flanges, and the leading spokes on the outboard side. I did not interlace my spokes as the reasons I found while researching the subject were not compelling enough to use for my build. Additionally, my Bontrager RaceLite carries the same pattern and I haven’t experienced any issues to date.
The Wheel
Let’s look at the measured results for the drive-side spokes:
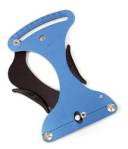
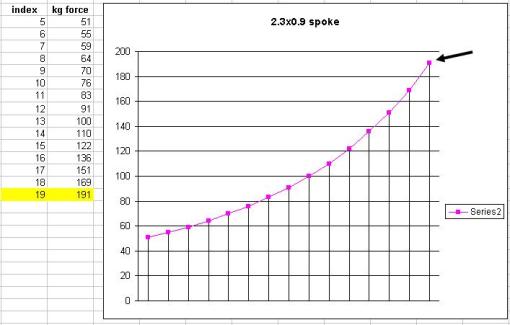
The preceding MS Excel spreadsheet illustrates what might be five or six successive iterations of spoke adjustment followed by measurement as I slowly brought the drive-side spokes up to tension while addressing lateral alignment, radial alignment, and spoke twist. The kg-f column automatically interpolates the amount of force based on the index input. The instruction manual for the TM-1 states:
Conversation with Tim at HED concerning the design of the Belgium C2 rim and the resulting spoke tension revealed that their target index range was 19 to 22. They did some in-house testing with the CX-Ray spokes to arrive at their target range. However, this was off the scale on the supplied Tension Meter table. I needed a kg force number to work towards. I observed that the majority of my final index readings were less than 19. The available index for a bladed 2.3mm x 0.9mm spoke stops at 18 on the TM-1 tension table. So I needed the last figure corresponding to an index of 19 in order to estimate all the decimal index points between. I used an MS Excel graphic as an easy/quick method to arrive at this number, rather than whip-out some quadratic regression calculation:
So, looking at the 5.1% drive-side tension variance and the very small amount of displacement, I think I have a fairly strong, true, and durable wheel, which should serve me well for quite a long time. Once I installed the new wheel into the frame, I only had to adjust my rear brake for the increased rim width. After riding the wheel for about four days, I made a very small adjustment to two spokes where the blades were slightly sideways to wheel rotation. Other than that, I haven’t had to do a thing except enjoy it.
One thing does concern me. Sapim lists the CX-Ray’s middle section strength at 1600 N/mm2, which roughly equals 163 kg-f/mm2. My estimated average tension is 172 kg. I hope that I haven’t overshot the allowable stress margin. On the other hand, HED’s target index range ran up to 22, which is far above my results. I suppose I could take one of my extra spokes down to an engineering test shop and test the spoke to failure, then I’d know.
When discussing these types of things with external companies, I’m aware of the perspectives of liability. This is my project and I accept what happens to my wheel as my own responsibility.
The Ride
I can feel the same Continental Gatorskin training tire tracking more securely through familiar sets of turns than when the tire sidewall flexed on the skinnier Bontrager rim. Or possibly the better reason is that this wheel is stiffer than the Bontrager RaceLite. I won’t ultimately know unless I fix the wheels sideways in a jig, apply a constant force and measure the resultant deflection. But this wheel subjectively feels and rides better. I’ve already thought about building-up a matching front wheel. Additionally, I can hardly wait to try out the Hutchison Atom Comp, which received nice reviews. This tire and wheel should make a nice set.
The Training
In short, the SL+ is going to fully revise my training and schedule. Having the ability to record and collect data from outdoor rides as well as indoor training sessions will markedly impact my minor and major goals and the methodology to get there. Additionally, wattage sourced from bona fide strain-gauge data has more credibility than data from fit-curve estimates. I’ve about six months to work to my advantage before the next racing season.
Thinking about the possibilities motivates me. How are you going to get stronger for next season?
12/31/2011 edit: After I built the matching front wheel, I checked the lateral true of this rear wheel. The displacement was less than 0.01 inch…I was pretty pleased with that. The wheel build continues to perform as I had intended it to.









This was quite an interesting article that goes to show exactly how much of a science wheel building has become. At my former bike shop we had an old man who’s only job was to make wheels. He sat on this stool and would make them by hand right before your eyes. It was pretty cool but I doubt his wheels are as perfect as yours.
Great reading on your blog Eric. It was great meeting you today and thanks for helping with the tuning.
I think a power meter could help with developing better vo2 & lt levels not just in cycling but through other exercise regimes as well…..wish they weren’t so expensive!!!
Jeff,
You’re quite welcome. I enjoy anytime I get to talk to racers, trainers, and enthusiasts of the road-racing sect otherwise! Let me know if I can be of further help.
I wrote a paper on this in College, had i had your ability to articulate my thoughts and research, I may possibly have received a much better grade. Great Job!
Thank you for the compliment! I hope my posts are informative and entertaining to you. I do like writing about what I’ve experienced.
-Eric
This is gold. Almost exactly what I am building. Ordering spokes and nipples tomorrow and then I’ll be all set. Thanks for writing!
Hey Surly,
You’re welcome. I really enjoyed working this project and I’m reaping the benefits now during off-season training. I hope your project is as fun as mine was. Email me with any questions you run into!
-Eric
Hey there, I read your blog entry about your Powertap wheel build with great interest, as I’m thinking about taking on a similar project during the off-season. Having ridden on your build for awhile now, how do you like how the wheel turned out? Anything you would do differently? Would love to hear your thoughts…
Hello,
I’m glad you enjoyed the build post. I thought there might be someone else out there who was thinking the same as I was in the context of a PowerTap wheel build. I love how the wheel turned out and I don’t think I would change anything. It’s still solid as a rock – true in the lateral and radial planes. The simple shape of the rim and spokes allow for an easy wipe-down during cleaning and the black rim and non-painted spoke aesthetic still looks terrific on the Madone frame as well.
Based mostly in part from this experience, I purchased an identical front rim and a Chris King R45 hub in black. I just haven’t bought the CX-Ray spokes yet to do the build for a matching wheelset. I raced this last season on the PowerTap wheel and used my OEM Bontrager Racelite wheel in the front. While the wheels didn’t match, it didn’t seem to affect my performance that much. I placed 8th overall in the Inland Road Race Series in the masters 40+ class, much better than the previous season.
So I hope these notes are useful to you. Next season I’ll have a complete wheelset that is lighter with the benefits of a sew-up-like ride and lower cost in a clincher tire setup. To boot, I’ll again be able to record race-pace data and compare that to my training intensity. This will allow me to close the difference gap in training and eventually be more competitive on the course.
And that’s why we’re all doing this sport right? To know how fast, strong, and competitive we can be?
Keep it fun,
Eric
Quick question, how much do you weigh? Wondering what drove you to 24H. I weigh 185 these days so I am thinking 28H would be a better call for me. Just curious.
Hello Tod,
At the time of the rear wheelbuild, I weighed about 171. As far as the choice of drillings, my RaceLite has 20H and served as the baseline for decision-making. A wheel’s durability increases with the number of spokes according to Jobst Brandt, so I choose the next higher drilling available-24h. This wheel and its matching front wheel would eventually become my training wheelset. As a lesser point, a trade-off would occur with the increase in drag because of additional spokes, but I think the difference would be imperceptible to me.
At 185, I think a 28h drilling would be just fine for you.
Thanks for your response and for reading. I hope the article was helpful!
-Eric
Eric,
Great article. I noticed that in all 3 of your spoke length calculations, you had slightly different dimensions listed for the hub, curious as to why.
Christian
Hello Christian,
A very good question. Some of the spoke calculators are very specific about where a particular dimension line is located. That is to say, does the dimension line start at the outside surface of the flange or at the centerline of the flange? In this quick example, the Pro Wheel Builder Spoke Calculator has the flange dimension lines drawn drawn to the center of the flange. Likewise, the flange diameter dimension line is drawn to the center of the flange holes. Another example is the DT Tool Spoke calculator 2.0, within the help file you’ll find a note that states, “The flange diameter describes the distance of the individual spoke holes; measured from center to center. I noted these variations when I was calculating my spoke lengths, and I adjusted the input accordingly.
For me, the bottom line was that the spoke length was neither too long or too short. Too short would mean I wouldn’t have sufficient thread to properly tension the spoke, and too long would mean I would use up all the thread and not have a spoke that was near the proper tension. In retrospect, I could have rounded down even more because once the wheel reached it’s final tension, many spoke ends were very close to the slot of the Polyax nipple. I did this with my front wheel build and was quite happy with the result.
I hope this answers your question. If not please contact me and I’ll give you my phone number so we can nail it down.
Cheers,
Eric
Hi Eric,
Great article. Just curious what do you think about Velocity Fusion rims. Do they meet any of your criteria?
Thanks…..Sofia
Hi Sofia,
At first glance the Fusions look similar to my Hed Belgium C2s. The weight is almost the same, as is the ERD. The Fusion is available in more spoke drillings than the C2, so that is a benefit. More spokes mean a more even distribution of spoke tension, and an increase in the durability of the wheel assuming a quality build process. Double-wall construction is a plus. The cross-section is different with 1mm more in depth and the rim width at a standard 19mm, wherein I wanted the wider cross-section of the C2. One characteristic I could not determine during my quick search on the web concerned the type of joint used in the construction of the Fusion rim. I could not confirm whether the joint is sleeved and pinned, or welded. I prefer a welded joint over a sleeve and pin for a couple of reasons (1) as the rim wears I don’t want to feel the joint through my brakes due to any uneven wear and, (2) a sleeve and pin can work loose over the life of the wheel causing a “click” noise during rotation. (This latter condition occurred with my Mavic Classics.) On the other hand, if you’re not too concerned with these characteristics, you can’t beat the low-cost of purchase ~$65. Overall this looks like a good value.
Let me know what you find out and thanks for reading!
Eric
Hi Eric, how is the spoke tension working out for you? Any issues? I am building a set of 28H C2s and was wondering how high to go. Thanks, Chris
Hey Chris,
Nope. No issues with either wheel thus far. (I don’t expect any.) I wrote a bit about spoke tension capacity in a previous post. This is the part that requires some forethought. I really would like to start with the spoke pull-out capacity of the rim, but I was not able to learn that figure. In short, I would want to start with that number, subtract a safety factor, and the new number becomes my spoke tension limit. In the case of my front wheel build, that figure was 78% of the spoke strength itself, since I did know that number. (Sapim spoke strength is published on their website.) The idea is to use the highest average (uniform) tension to produce the stiffest wheel possible using the components that I had. So far so good.
My next project is to build a racing wheelset since I now have a training set and spares for the wheel-support vehicle when I’m on the course. I’m thinking 32mm to 36mm deep carbon tubular rims with my usual choice of spoke and hub.
Let me know how your build goes and if I can answer other questions for you.
Enjoy!
Eric
[…] side calipers, and rim wear is not symmetrical. I can’t measure the rear wheel because the PowerTap hub is being repaired. I’m going to bet that its wear rate is about the […]